Do you struggle to keep tabs on important details shared via email?
Manual extraction of key information is tedious and time-consuming, even more so when you have a bulk of emails, often resulting in missed deadlines/appointments and poor business decisions.
Wouldn’t it be great if you could transfer all critical data from your emails to a Google spreadsheet, displayed neatly in rows and columns, with just one click?
Say no more!

cloudHQ’s Emails to Sheets extension is an excellent parsing tool that can easily extract data from your emails to Google sheets.
How to Export an Email to a Google Spreadsheet
cloudHQ has introduced an ad-hoc feature to simplify email exportation for busy individuals like you.
Follow the steps below to transfer the content of an email to a Google sheet.

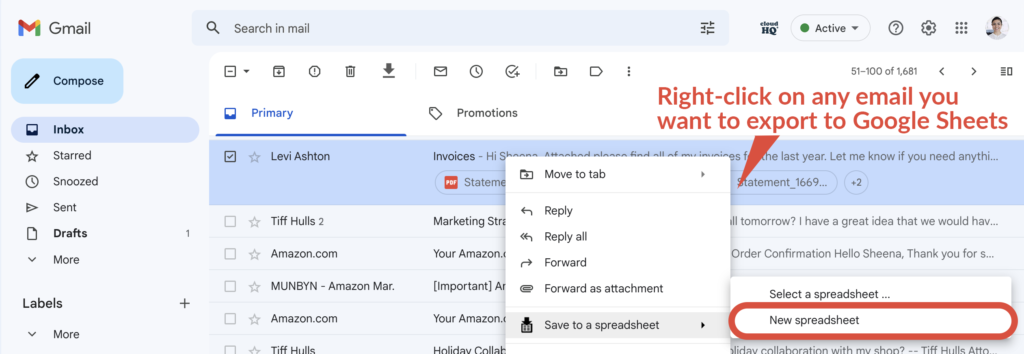
- Open your Gmail inbox.
- Select the email that you want to export and right-click on it.
- From the dropdown menu, click “Save to a spreadsheet.”
- Click “New spreadsheet” from the two options.
Voila! Your email will start exporting.
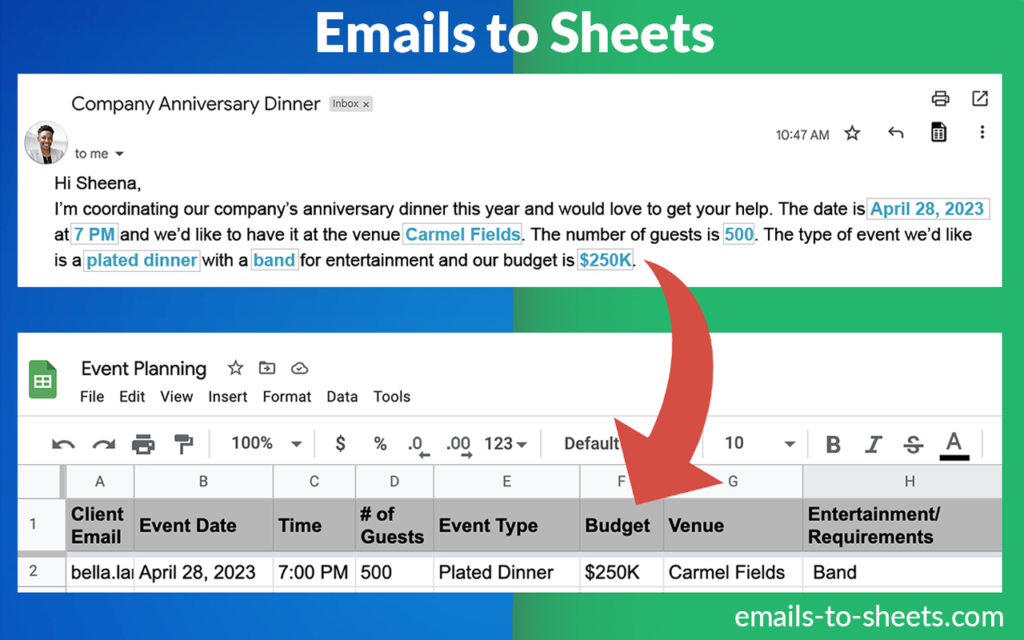
Below is a snapshot of how key information from an email looks once exported to a Google sheet.

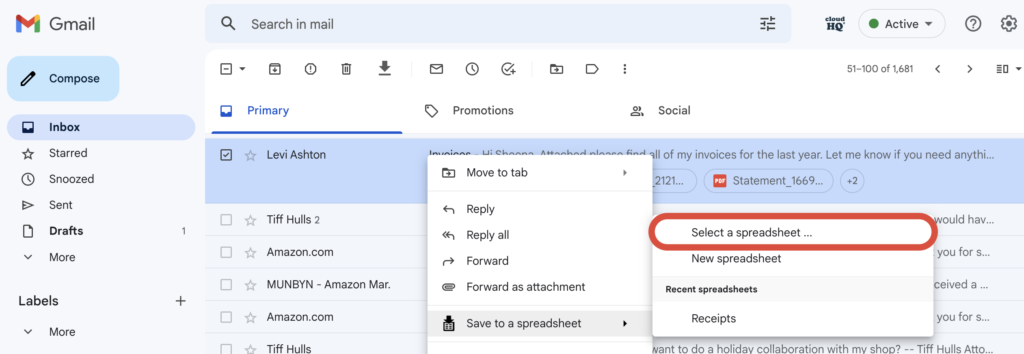
If you wish to export this email to an existing spreadsheet, follow the same steps as above, but click on “Select a spreadsheet…” instead of “New spreadsheet”.

And you’re done!
Now, let’s dive in to discover how the Emails to Sheets extension works for bulk emails.
How to Export Key Information from Bulk Emails with the Emails to Sheets Extension
Using the app to export email content one by one isn’t ideal when you want to export many emails to Google Sheets.
Follow the steps below to export email data from many emails with just a few clicks.
Step 1: Create a Gmail Label
The first thing you should do after opening your Gmail inbox is to create a label to group all emails with the same topic you want parsed together.
For example, you could create a label to access emails titled “Order Confirmations” in one place.
Step 2: Apply the Filter to All Existing and Future Emails
After creating the filter, you must click “Apply the label: Order Confirmations” and “Also apply filter to matching conversations.” With just an added click, you will automatically transfer relevant future emails to the selected label, so you don’t miss out on any message when exporting to a Google spreadsheet.
Step 3: Start Exporting
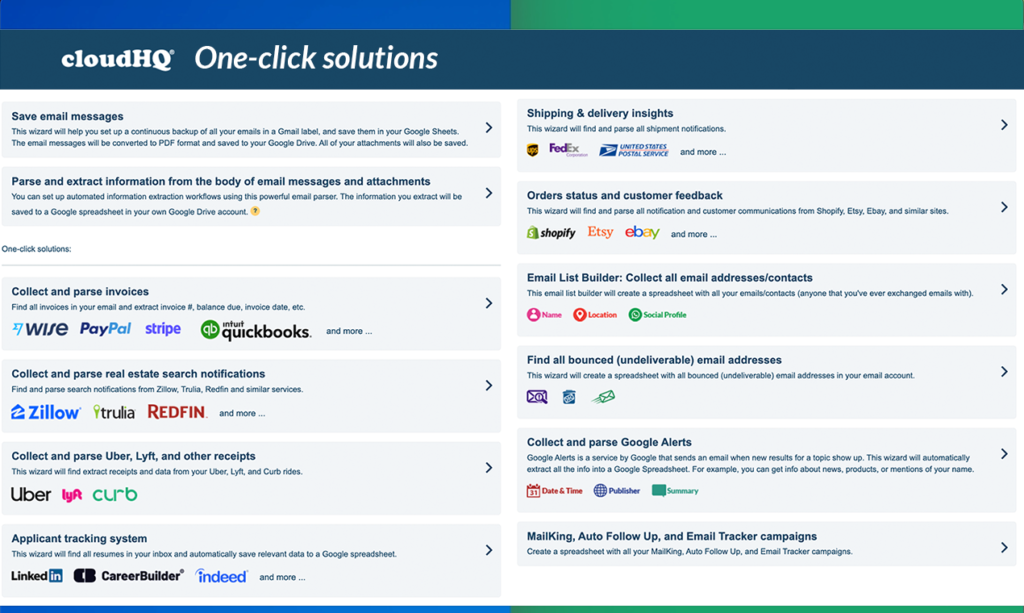
Click here to start the Export Emails to Sheets wizard. You will have all sorts of 1-click wizards to make it really easy on you. Select one that matches what you’re trying to do. You will be done in seconds.

If the 1 click wizard doesn’t exist yet, you can click on the 2nd wizard that says, “Parse and extract information from the body of email messages and attachments.”
In your inbox, choose the Gmail label “Order Confirmations” to only export those emails to Google Sheets.
Step 4: Start Exporting
Next, click “Add or Edit Parsing Rules” to confirm the correct parsing of the emails.
That’s it!
The exportation of your bulk emails will start and continue in the background while you divert your attention to other tasks.
Enjoy the Benefits of cloudHQ’s Emails to Sheets Extension
If you’re looking for an efficient way to manage your emails and data, exporting key information from bulk emails to a Google sheet is a great way to go. It can save you time and make it easier to find the information you need.
Here are just a few of the benefits of this approach:
1. Save Time
With bulk emails, it can take a lot of time to parse out the data you need. You can quickly search, sort, and filter the information by exporting it to a Google sheet. This can save you time and effort in the long run.
2. Increased Efficiency
By exporting your data to a Google sheet, you’ll be able to set up automated processes that run in the background. This can help you streamline your workflow and stay on top of your email communications.
3. Improved Organization
Having your data in a Google sheet makes it easier to organize and manage. You can quickly find the data you need by searching, sorting, and filtering. Besides, you can access your data from anywhere and ensure it’s up-to-date and accurate.
Want to learn more about cloudHQ’s Emails to Sheets extension?
Click here.
